

You don’t see a lot of wall stenciling these days, which is a real shame. This lost art can produce truly beautiful results for the painter that is willing to commit to it.
Of course, like anything worth doing, there is a little bit of a learning curve. If you’re going to try to stencil like a pro, you are going to need to do some practice and research. For the latter, at least, we have you covered.
Read on for a succinct guide to spray painting with stencils.
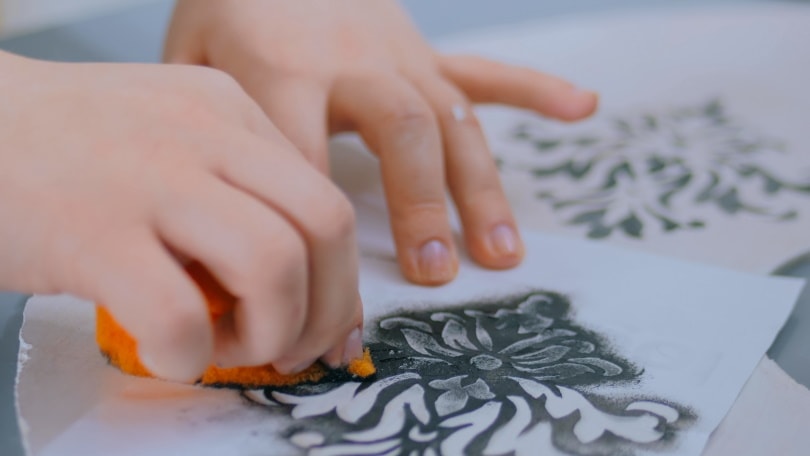
Step 1: Choose Your Stencil:
You may very well have done this already, but if you have not you are going to need to. There are thousands of options out there (if not more) and in fact, you can probably find many of them online for free.
However, regardless of where you get the stencil, once you do have it you can move on to the next step.
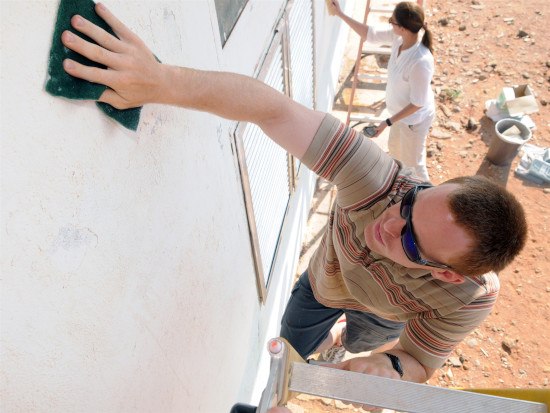
Step 2: Prepare the Stenciling Space:
Preparing the stenciling space is going to involve a few steps. First, you are going to want to clean the parts of the wall that are going to be exposed to new paint.
Built-up dirt can lead to peeling paint, and otherwise visually displeasing results, so be sure to do this part of the process thoroughly before you proceed.
Once you have done this, you can feel free to set up some newspapers, or even canvas around the floor and furniture to ensure no unfortunate messes.
This should be a relatively mess-free project, but when dealing with paint, you never can be too cautious, right?
Step 3: Attach Your Stencil to the Wall:
Now that your painting zone has been prepared, you can feel free to attach your stencil to the wall. For this part of the process, you are going to want to use a spray adhesive. You do, however, want to make sure that you get a low-tack option.
Glue spray adhesives are designed to create a permanent bond, which you do not want.

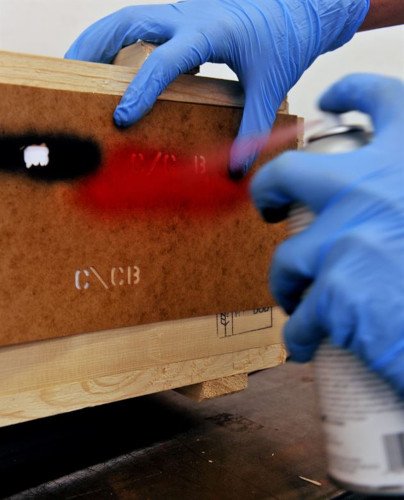
Step 4: It’s Time to Paint:
Now that the stencil is up on the wall, you can feel free to paint away. The spray can is going to make things pretty easy, but remember that less is more here.
If you use too much paint, you will probably find that it bleeds beyond the stencil, which will leave the rest of your wall with a new paint feature that you were not hoping for.
And of course, as is true of any spray paint job, you will want to keep your can about one foot away from your wall.
After that you are done! If you want to do a larger stenciling project, you can simply repeat these steps and apply them to a larger swath of your wall.
Conclusion:
Who said that stenciling had to be hard, right? As you can see, the only thing between you, and the stenciling results of your dreams are these simple steps.
Following the guide that we have provided today, you should have no trouble at all spray painting your walls with stencils to achieve beautiful results. Just take your time, follow our recommendations, and enjoy!
See Also:
- How to Remove Spray Paint from a Wall in 6 Easy Steps (with Pictures)
- 10 Best Paint Sprayers – Reviews & Top Picks
Featured Image Credit: pixel2013, Pixabay
Contents